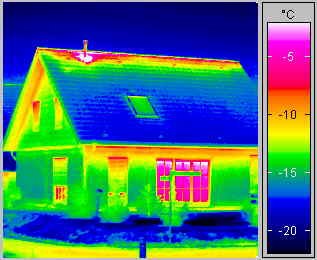
In the inspection industry, infrared cameras are mainly used to gauge what’s referred to as “apparent” temperature. Because of the differing levels of emissivity of different areas and objects, as well as other factors that can influence data, such as wind and weather conditions, the exact temperature of an anomaly can be trickier to determine with infrared alone, and this is why the most common purpose of employing thermal imaging in inspections is to locate and document the problems. 

For example, a dark area in the thermal image of a ceiling may indicate that there is moisture above it. Once this has been observed, a moisture meter can be used to confirm moisture intrusion. The pattern of the wet spot can be documented with the camera, and the area above the ceiling can then be examined through infrared in an attempt to determine the source of the leak.
In a case like this, which is a typical example of how infrared is often used in an inspection, the exact measurement of the temperatures — the quantitative measurement — is not relevant. The important thing is that the apparent temperature difference led the inspector to a problem area that could be documented and examined more closely. This makes inspection with an IR camera a qualitative measurement, rather than a quantitative one. Thermal imaging is used to locate anomalies through differences in apparent temperatures, analyze the patterns, and document the issues.
